How to Build a PC — Complete Beginner Guide 2026
Building your own PC sounds intimidating, but it is actually like assembling LEGO for adults. If you can follow instructions and turn a screwdriver, you can build a PC. Hundreds of thousands of people build their first PC every year with no prior experience. This guide walks you through every step — from choosing parts to your first Windows boot — with no jargon and no assumed knowledge.
Why build a PC instead of buying one?
The most common reason is value. A custom-built PC typically delivers 20-30% more performance than a pre-built at the same price, because you are not paying for assembly labor, bundled software, or a brand premium. When you build your own machine, every dollar goes directly toward the hardware that determines your gaming experience.
The second reason is control. You choose exactly what goes into your machine — the CPU, the GPU, how much storage, which case. Pre-built manufacturers often cut corners in ways that are invisible until you look at the specs: cheap power supplies, slower storage, or RAM that runs at lower speeds than it should. When you build, you know exactly what you bought.
The third reason is upgradeability. You can replace individual components when they become outdated — upgrade just the GPU in two years, add more RAM, swap in a faster SSD. Pre-built PCs often have proprietary cases and power supplies that make future upgrades difficult or impossible.
What parts do you need?
Every PC needs seven core components. Here is what each one does and why it matters:
Optional but recommended: a CPU cooler upgrade (if your CPU does not include one or runs hot), and additional case fans for better airflow. WiFi adapter if your motherboard does not have built-in WiFi.
Compatibility rules you must know
PC building has a few non-negotiable compatibility rules. Get these wrong and your build will not work:
CPU and Motherboard socket must match. AMD Ryzen 7000 and 9000 series CPUs use AM5 sockets. AMD Ryzen 5000 series uses AM4. Intel 12th, 13th, and 14th Gen use LGA1700. You cannot mix these. A CPU from one socket family will not fit in a motherboard for another.
RAM type must match the motherboard. DDR4 and DDR5 are physically different and not interchangeable. AM5 motherboards use DDR5. Most AM4 and LGA1700 boards use DDR4, though some LGA1700 boards support DDR5. Check your motherboard specs before buying RAM.
Your PSU must have enough wattage. Add up the TDP of your CPU and GPU, add 100W for the rest of the system, and buy a PSU rated for at least 20% more than that. For a Ryzen 5 7600 and RTX 4060 build, a 650W PSU is plenty. For a Ryzen 7 9800X3D and RTX 4070 Ti, get an 850W unit.
Case size must match motherboard size. ATX cases fit ATX, Micro-ATX, and Mini-ITX motherboards. Micro-ATX cases fit Micro-ATX and Mini-ITX but not full ATX. Mini-ITX cases only fit Mini-ITX boards. Most beginner builds use Micro-ATX or ATX for ease of assembly.
Step-by-step build guide
Follow these steps in order. Do not rush — a careful build takes about 2-3 hours for a first timer. It will be faster every time after that.
Plan your build and order your parts
Before you touch a screwdriver, plan everything on paper. Use our AI builder to get a fully compatible parts list for your budget — it automatically handles socket compatibility, RAM type, and wattage. Once you have your list, order everything from one retailer if possible to simplify returns. Check that your case is compatible with your motherboard form factor (ATX, Micro-ATX, Mini-ITX) before ordering. Most beginner builds should start with a Micro-ATX or ATX case for easy assembly.
Gather your tools and workspace
You need exactly one tool: a Phillips head screwdriver (size #2). Everything else is optional. An anti-static wrist strap is cheap insurance against killing a $300 CPU with static discharge — buy one. Set up on a large, flat, well-lit surface. A dining room table works perfectly. Unbox all your parts and lay them out before you begin so you can see everything. Keep the boxes — you'll need them if you have to return anything. Avoid building on carpet, as it generates static.
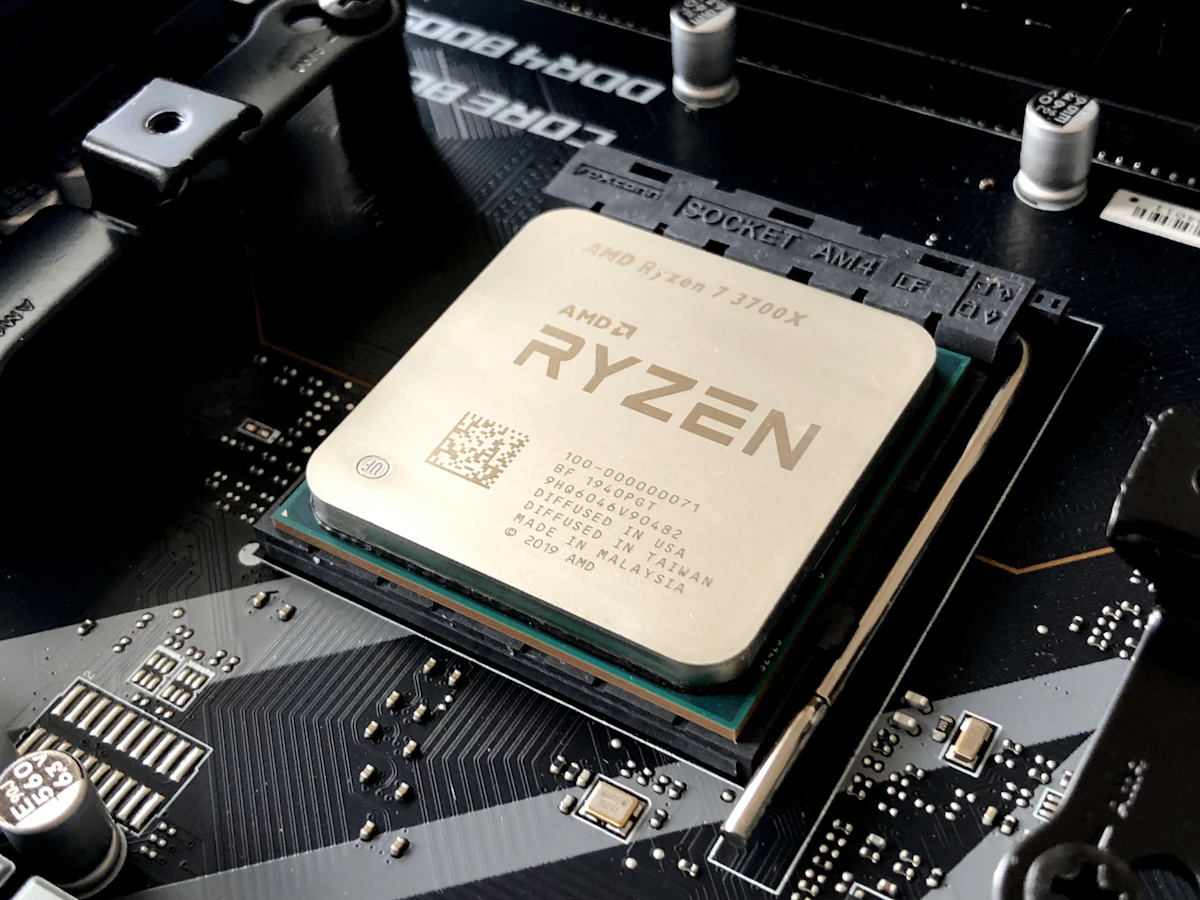
Install the CPU onto the motherboard
Lay your motherboard flat on its box (the box acts as a non-conductive surface). Open the CPU socket by lifting the retention lever. For AMD AM4/AM5 CPUs, look for the small golden triangle on one corner of the CPU — align it with the triangle marked on the socket. For Intel CPUs, align the notches on the CPU with the socket. Never press the CPU down — gravity should seat it. Lower the retention lever and lock it. For AMD this takes some force and a small plastic cover will pop off — that's normal. Do not touch the pins or contacts.
Install the CPU cooler
Apply a small pea-sized dot of thermal paste to the center of the CPU — most aftermarket coolers include this, and many have it pre-applied. Do not spread it yourself; the pressure from mounting the cooler will spread it evenly. Mount the cooler using the backplate and screws included with it, following the cooler's manual exactly. Tighten screws in a cross pattern (like changing a tire) to ensure even pressure. Connect the fan cable to the CPU_FAN header on the motherboard — usually labeled near the top of the board. If you skip this, your PC will overheat and throttle.
Install RAM in the correct slots
Check your motherboard manual for the correct RAM slots — for dual-channel performance, you typically use slots A2 and B2, or the second and fourth slot from the CPU. Installing RAM in the wrong slots cuts your memory bandwidth in half. Line up the notch in the RAM stick with the slot (it only goes one way), press firmly down on both ends until you hear two clicks. It takes more force than you'd expect — that's normal. DDR4 and DDR5 are not interchangeable, so make sure your RAM matches your motherboard. RAM is also the most common compatibility issue, so check your motherboard's QVL (qualified vendor list) if you have problems.
Install your NVMe SSD
If you have an NVMe M.2 SSD (the credit card-sized drive), install it before putting the motherboard in the case — it's much easier. Find the M.2 slot on your motherboard (usually between the PCIe slots or near the CPU), remove the tiny securing screw, slide the SSD in at a 30-degree angle until it's fully seated, then press it down flat and replace the screw. Some SSDs have a heat spreader label on top — make sure it faces up. If your motherboard has multiple M.2 slots, check the manual for which slot is the fastest (usually the first one, connected directly to the CPU). For SATA drives, install them in the case and connect both data and power cables after mounting the motherboard.
Mount the I/O shield and motherboard in the case
Before installing the motherboard, snap in the I/O shield — the metal plate that came with the motherboard. It protects against dust and EMI. Press it into the rectangular opening at the rear of the case from inside; it clips in with a snap. Check that your case has the correct brass standoffs installed for your motherboard size (usually pre-installed for ATX). Lower the motherboard in, align the rear ports with the I/O shield, and confirm the screw holes line up with the standoffs. Screw in the motherboard starting from a center hole, then work outward. Do not overtighten — firm is enough.
Connect power supply cables
Install the power supply in its bay (usually bottom or top of the case) and secure with four screws. There are two essential power cables: the 24-pin ATX cable (large connector, motherboard edge) and the CPU power cable (4+4 or 8-pin connector near the top of the motherboard). The CPU power cable is the most commonly forgotten cable — the PC will not post without it. Route cables through the cable management holes in the case to keep airflow clear. If your PSU is semi-modular or fully modular, only connect the cables you need.
Install the GPU
Remove the metal slot covers from the case that correspond to your GPU's position (usually slot 1 and slot 2 on the back of the case). Lower the GPU into the primary PCIe x16 slot — it's the longest slot, usually closest to the CPU. Press firmly until you hear a click from the slot's retention mechanism. Secure the GPU bracket with screws. Connect the PCIe power cables from the PSU — most gaming GPUs need 1-2 PCIe power connectors (6-pin or 8-pin). If you plug in the PCIe power incorrectly, the GPU will not power on or may display an error.
Connect front panel cables and fan headers
The front panel cables — power button, reset button, HDD LED, power LED — are the fiddliest part of any build. They are tiny 2-pin connectors that connect to a header block in the corner of the motherboard labeled 'F_PANEL'. Refer to your motherboard manual for the exact pin layout. The power button is the only essential one; the rest are optional. Also connect USB 3.0 headers (large rectangular connector), USB 2.0 headers (small 10-pin block), and front audio header (AAFP). Connect any additional case fans to available fan headers or a fan hub.
First boot into BIOS and verify everything
Connect your monitor to the GPU (not the motherboard's video output), plug in keyboard and mouse, and press the power button. You should see the manufacturer logo screen, then the BIOS. In the BIOS, verify that: your CPU is detected at the correct speed, all RAM sticks are detected and running at their rated speed (enable XMP/EXPO if available), your SSD appears in the storage list, and all fans are spinning. If something is missing, reseat the cable or component. Before installing Windows, save and exit BIOS.
Install Windows from a USB drive
Download the Windows 11 Media Creation Tool from Microsoft's website on another PC, and create a bootable USB drive with at least 8GB capacity. Insert the USB drive, restart, and boot from the USB (you may need to change the boot order in BIOS or use the boot menu key — F8, F11, or F12 depending on your motherboard). Follow the Windows installer, select your SSD as the install location, and complete the setup. After installation, install your GPU drivers from Nvidia or AMD's website — do this before playing any games. Then install your motherboard's chipset drivers from the manufacturer's website.
After first boot — what to install
Once Windows is up and running, you are not quite done. Install these things in order before you start gaming:
GPU drivers: Go to Nvidia.com or AMD.com, download the latest driver for your specific GPU, and install it. This is the single biggest performance improvement you can make on a fresh Windows install.
Chipset drivers: Download from your motherboard manufacturer's website (MSI, ASUS, Gigabyte, etc.). Search your exact motherboard model and download the chipset and other drivers. These help your CPU and motherboard communicate at full speed.
Enable XMP/EXPO in BIOS: This makes your RAM run at its advertised speed instead of a slower default. Restart, enter BIOS (usually Delete or F2 on boot), find the XMP/EXPO setting in the memory or performance section, enable it, and save. Without this, a 6000 MHz DDR5 kit runs at 4800 MHz — a significant waste.
Windows Update: Run all Windows updates to get security patches and the latest drivers for built-in components. This can take 30-60 minutes but is important.
Common mistakes to avoid
These are the most frequent errors first-time builders make. Read them now so you do not learn them the hard way:
Forgetting the CPU power cable. There are two power cables for the motherboard: the 24-pin ATX main power and the 4+4 or 8-pin CPU power near the top of the board. Many first builds forget the CPU power cable and the PC will not boot. It is the most common "my build won't turn on" mistake.
RAM in the wrong slots. For dual-channel memory, you need to use specific slots — usually slots 2 and 4 from the CPU (labeled A2 and B2 or B1 and B2 depending on the board). Check your manual. Single-channel RAM is noticeably slower in games.
Not installing the I/O shield first. The I/O shield snaps into the rear of the case. Many builders forget it and have to unmount the motherboard later to install it. Always do it first.
Forgetting the standoffs. Brass standoffs go between the case and the motherboard. Without them, the motherboard can short circuit against the metal case. Most modern cases have them pre-installed, but check.
Plugging the monitor into the wrong port. After installing a GPU, always connect your monitor to the GPU, not the motherboard. The motherboard display output is disabled when a GPU is present (unless you specifically enable it in BIOS).
Frequently asked questions
How long does it take to build a PC?
A first-time builder typically takes 3-4 hours from unboxing to first boot. Experienced builders do it in 45-90 minutes. The most time-consuming parts are cable management and front panel connectors. Do not rush — a careful, methodical approach prevents mistakes that cost more time to fix.
Do I need an anti-static wrist strap?
Technically no, but it is cheap protection against a very expensive mistake. Static discharge can damage or destroy CPUs and RAM — components that cost $100-500. A wrist strap costs $5-10. At minimum, periodically touch a metal part of your case to discharge any static buildup before handling components.
What if my PC does not turn on?
Check in this order: (1) Is the power supply switch on? (2) Is the 8-pin CPU power cable plugged in? (3) Are all fans and LEDs completely dead, or do they spin then shut off? Complete silence with nothing happening usually means a missing power cable. Fans spinning then shutting off usually means a POST failure — check RAM seating and CPU installation. LED flashing codes on the motherboard will tell you exactly what is wrong.
Can I reuse parts from an old PC?
Storage drives, case fans, monitors, and peripherals (keyboard, mouse) can usually be reused. RAM can be reused if it is the same type as your new motherboard (DDR4 or DDR5). CPUs and motherboards are generally platform-specific. Old power supplies can be reused if they have enough wattage and the right connectors, but replacing a PSU over 5 years old is recommended for reliability.
Is building a PC cheaper than buying a pre-built?
Usually yes — by 15-25% for the same performance level. The savings are highest in the mid-range ($600-1,200 budget). At very low budgets, pre-builts using refurbished commercial parts can be competitive. At high budgets, building yourself saves the most money. You also get to choose exactly which parts go into your system, which is valuable for ensuring quality components.
What Windows version should I install?
Windows 11 Home for most users. It is the current standard, included with Windows 11 support on all modern CPUs, and required for some features like DirectStorage. If your CPU is too old for Windows 11 (the 7th Gen Intel cutoff is a notable example), install Windows 10 instead — it still receives security updates through October 2025.
You can do this
Building your first PC is genuinely achievable for anyone willing to follow instructions carefully. The components are designed to go together in one correct way, and the most common mistakes are easy to avoid once you know what they are. Thousands of people build their first PC every week — with no electronics background, no prior experience, and no special skills.
The result is a machine you understand completely, that performs better than an equivalent pre-built, and that you can upgrade and repair yourself for years to come. Start with your parts list — our AI builder handles all the compatibility automatically, so you can focus on the build itself.
Related articles
Want a custom build for your budget?
Try our free AI PC Builder — describe your games and budget, and get a fully compatible parts list with real Amazon prices in seconds.
Build with AI →